This article explains how to configure, edit, and add dynamic content to automated emails.
About automated emails
- Automated emails are marketing emails and are only sent to members who are subscribed to a chapter. Anyone can unsubscribe from automated emails at any time.
- As an administrator, you can manage and create automated emails. In your admin dashboard you can configure the email details, content, and customize the trigger for emails to be sent.
- Only the automated emails that are enabled will apply to all chapter-level events. Chapters cannot edit or create automated emails, but they can cancel or reschedule them.
- Automated email can't be configured/enable or disabled per event-type.
Unsubscribe removes a member from all emails for the chapter, including newsletters.
By default, there are different automated emails available within your instance. You can enable or disable them as needed. When you enable an automated email, it applies to all new events for all chapters. To apply a new email to an event that was already published, go into the event and click Publish.
- 48-hour Reminder to Attendees
- 72-hour Reminder to People Without RSVP
- Welcome to Chapter
- 2 Week Event Reminder to Chapter Team
- New Event Published for Chapter Members
- Post-Event Survey
- Canceled Event
- Rescheduled Event
Audiences and triggers
When you set up a new automated email, you can use audiences and triggers to determine when and to whom an email is sent to.
Depending on the automated email you're sending, you might want it to send based on things like an event, a member's activity, their registration status, or their membership status.
The audience you select for an email changes which triggers are available.
Audiences for automated emails include:
|
|
Clarifications:
- The Attendee audience refers to a single Attendee that was manually added to an Event, and can be only associated to the Manual Attendee Added trigger
When you select an audience that's relevant to an event, the triggers available include:
- Event Start
- Event End
- Event Publish Date
- Chapter Member Join Date
- Recurring Event Publish Date
- Event Canceled
- Sponsor Invoice Paid
- Event Updated*
- Chapter Team Member Join Date
- Chapter Activity Date
- Chapter starts collaborating
- Ticket Order Completed
- Manual Attendee Added
- Site User Joined
- Order Refunded
- User's Email Updated
Clarifications: When you select the Event Updated trigger, automated emails are only sent to your selected audience if one or more of these event details are changed: Start Date, End Date, Venue Name, Address, City, Zip Code
Formatting
Click and drag the rich text box where it says drop a component here.
Highlight a piece of text to apply formatting, such as bold, italics, font size, links, buttons, text alignment, headings. Click the small plus (+) icon to choose from additional editing options, such as images, videos, lists, quotes, and horizontal rule.
The option to add a button appears after you apply a link to the text.
Dynamic Tags
You can also use dynamic tags to include content in the subject and body of your emails that generates automatically for the corresponding event. Dynamic tags appear after you select a specific trigger for the email.
View a list of dynamic tags by typing an asterisk (*), and then start typing the name of a tag. For eg, if you are looking for an Event Title, start typing the text and you will see the drop list with it. 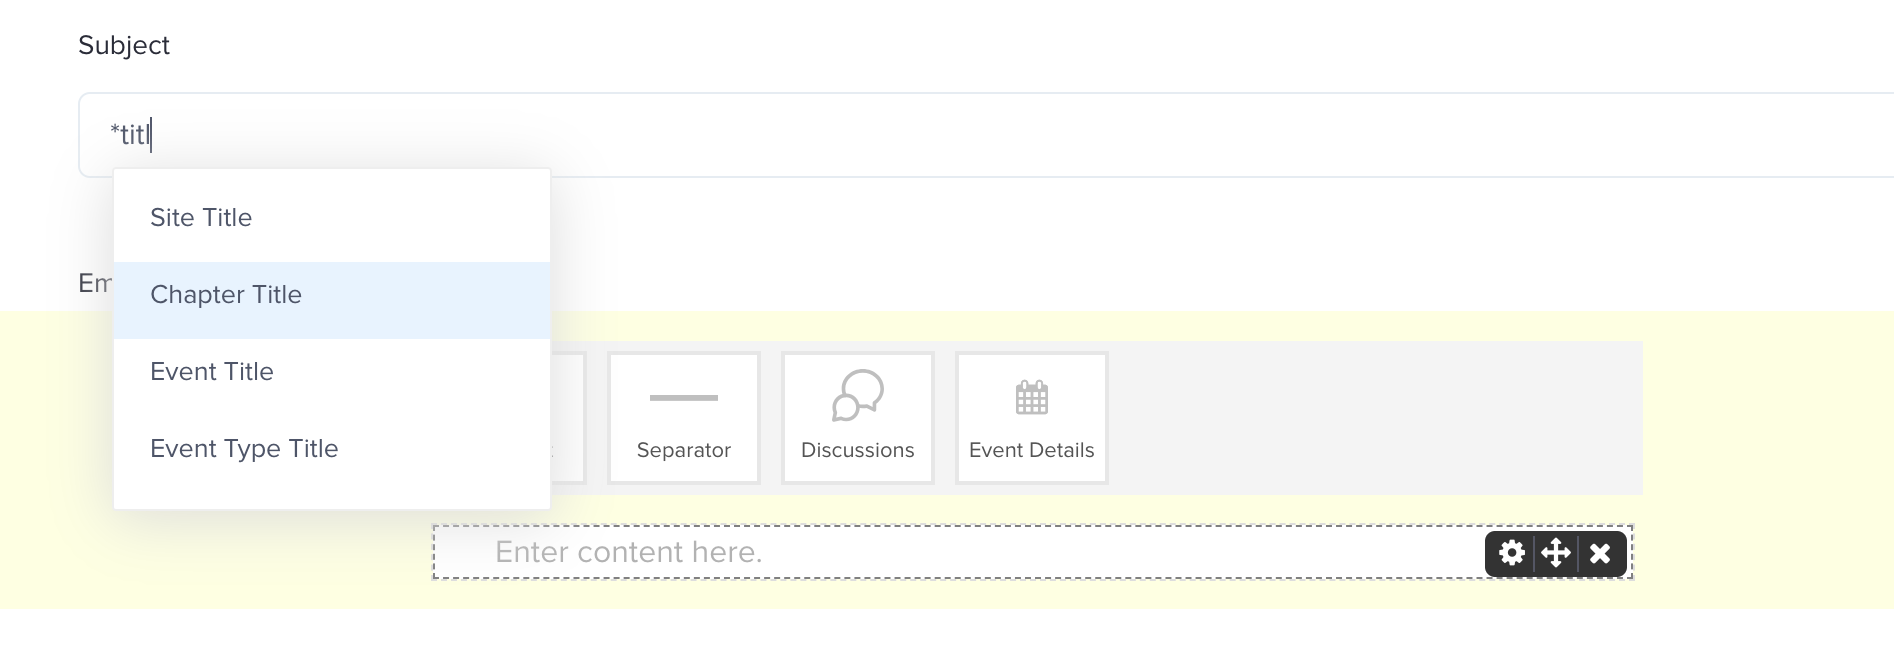
The different dynamic tags include:
|
|
Create a new automated email
In addition to the default emails available in your instance, you can create custom automated emails from scratch.
To create a new automated email:
- In the Admin dashboard, select Emails in the sidebar menu.
- On the Automated Emails tab, click New Email.
- Add things like a title, audience, and subject.
- Create the email content:
- Set the email trigger.
Every automated email sends based on a trigger that is paired with time parameters. For example, if you wanted to send an email reminder about an event, you can set a trigger of Event Start with parameters of 2 hours and before.
- Select the Automated Email Enabled check box to enable this email for all published events going forward.
- Save your changes.
Edit automated emails
To edit an automated email:
- In the Admin dashboard, click Emails in the left-hand sidebar menu.
- On the Automated Emails tab, select the automated email to edit.
- Change the email, such as the title, audience, subject, content, trigger, or enabled status.
- Click Save.
Edits you make to automated emails apply to all events. Newly created or enabled automated emails apply to events when they are published. That is, you need to re-publish an event to apply new or newly enabled automated emails. There are also some changes you can make on an event level for emails, like forms or event-specific emails.