This article outlines how to edit forms at the event level.
About forms
Forms are configured by an administrator in the Admin Dashboard, but you can modify the questions used per event. Available forms typically include:
- Pre-order: Displays when a user RSVPs/purchases a ticket to an event
- Post-event: Survey attendees after an event via an admin enabled automated email.
Edit an event form
Any fields added to these forms at the global level cannot be edited / removed by the Chapter Team unless it is unlocked. Locked fields can only be edited or removed by Admins. Any edits you make to a form apply to new attendees; changes are not retroactive.
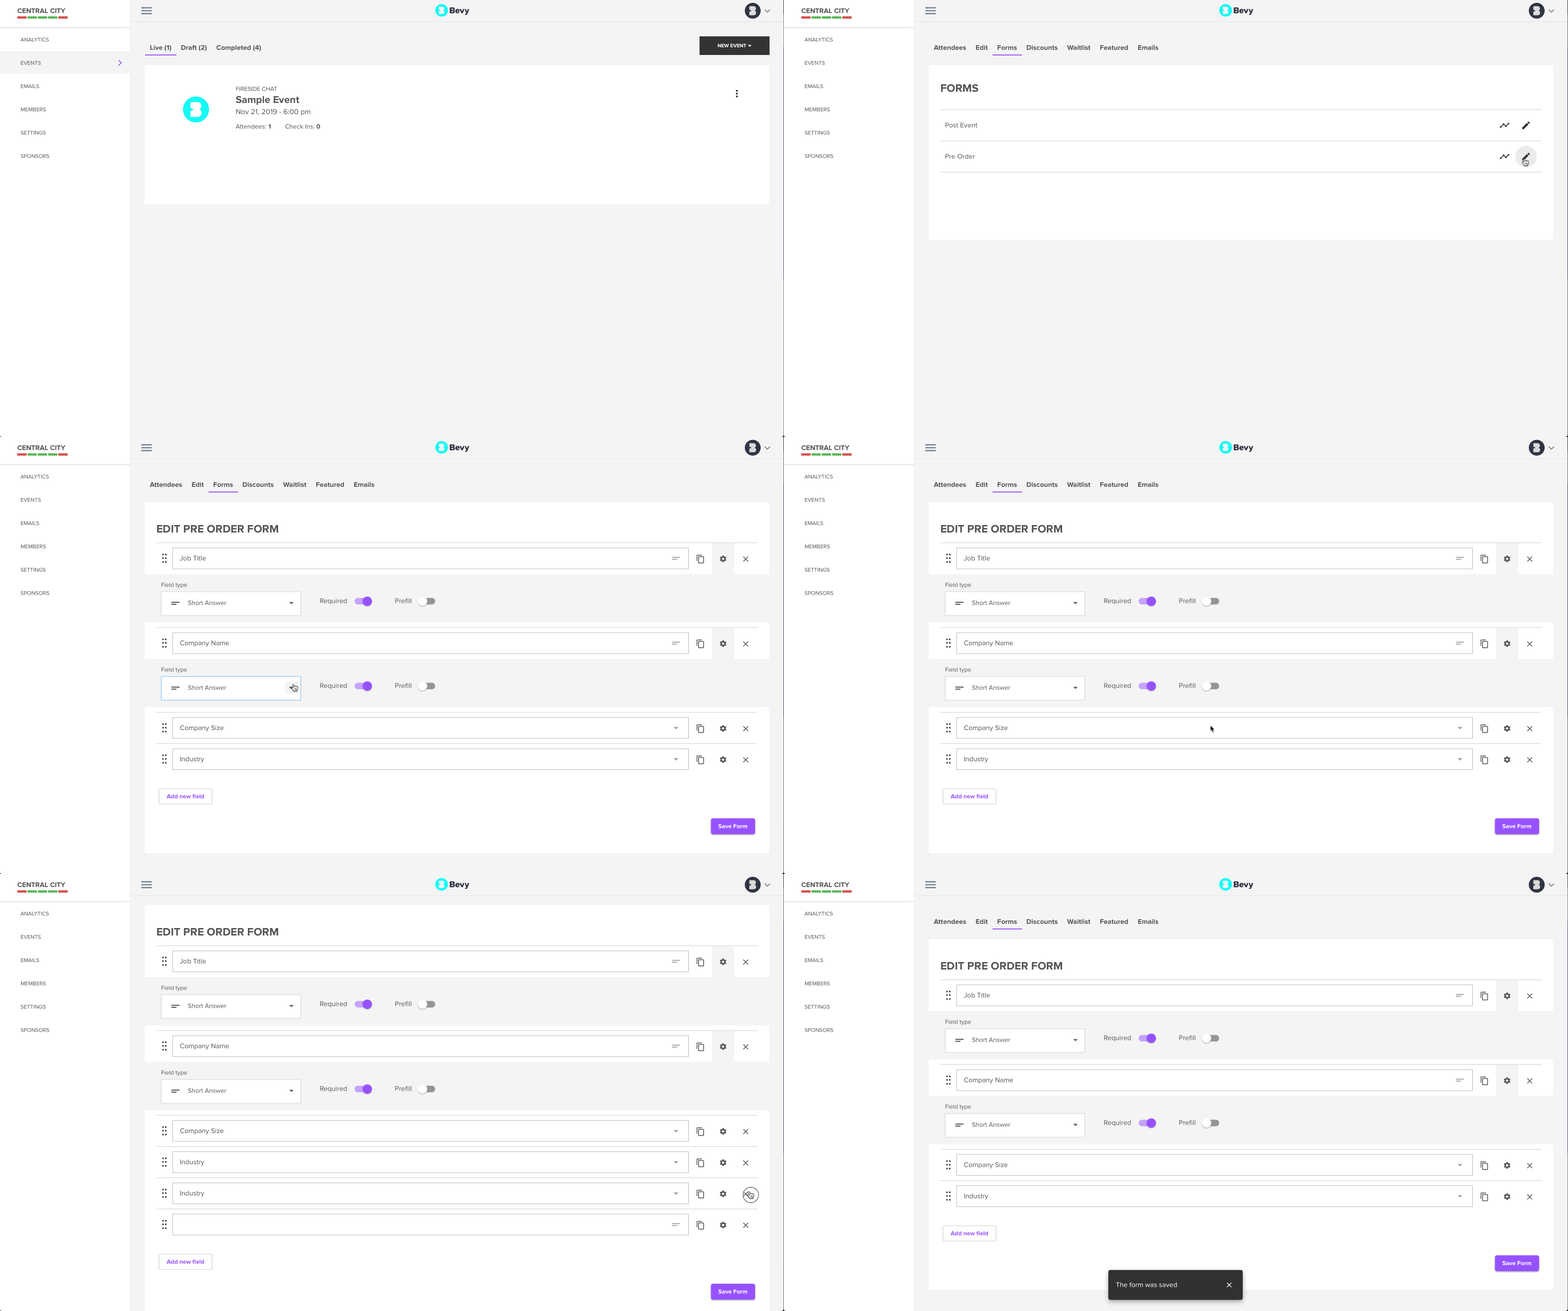
To edit an event form:
- From the Chapter Dashboard, click Events from the left sidebar.
- Click the event you want to manage.
- Click the Forms tab.
- Click the form you want to edit.
- Make your edits:
- Click Add new field to add a new field. Required fields types forces the user to enter a value when registering. Prefill uses the field's last entry to fill the value when the form loads.
See available field types and formatting options.
- Click Copy to duplicate questions and their properties.
- Click Add new field to add a new field. Required fields types forces the user to enter a value when registering. Prefill uses the field's last entry to fill the value when the form loads.
- Click Save Form.
- Click the Edit tab of the event, and then click Publish.

In the example above (pre-order), the form appears when an attendee registers for the event:

User information
You do NOT need to add fields to forms for data that is already collected automatically with event registration: Name, Email, City, State, Country, Region, Chapter title, Chapter ID, Event title, Event ID, Event type, Event date, User ID, Attendee ID, Responded (date), Entry ID.
Click to learn more about viewing survey responses (form results).